Author: Vickie D. Baker

  • A House Cleaning Job is a Bright Future

    A House Cleaning Job is a Bright Future

    You may be interested in house cleaning as a career option.

    • The house cleaning industry is a stable and lucrative career that offers a bright future.
    • A housekeeping job offers flexibility and can fulfil family or social obligations.
    • And from a health standpoint, working as a house cleaner means you get to keep your body moving instead of sitting at a desk all day which is Brandongaille reports that the industry for cleaning has seen an average growth of 6.6% each year over the past decade. Franchise Support also reports that the industry will grow by 10% by 2026. These statistics, along with the almost recession-proof status of the cleaning industry, prove that there are many house cleaning jobs now and in the future. How stable is the cleaning industry? Even in difficult times, the cleaning industry thrives, such as economic downturns and pandemics. The rise in health concerns has made it difficult for many Americans to use residential services. However, these concerns have also increased our desire for healthier, cleaner homes.
    • The trend of having a cleaner, more organized, and healthier spaces at home and work were already gaining momentum long before the pandemic. These trends highlighted the mental and physical benefits of cleaning, decluttering and minimizing germs.
    • These health benefits are becoming more widely known. However, our ability to maintain a clean home and keep it tidy is impacted by our increasingly busy lives. This has led to a greater demand for residential cleaning services and house cleaning, leading to more employment opportunities and better prospects for you.
    • It’s easy to understand why house cleaning is so popular.

    Green Products and Healthy Cleaning Processes are Leading the Way

    • The continued growth of the cleaning industry is also due to the increased emphasis on eco-friendly cleaning products and sustainable practices. People are becoming more aware of the negative effects of traditional cleaning products and chemicals.
    • Residential cleaning customers no longer need a sparkling clean home. Many people are not willing to accept the negative effects of traditional cleaning methods on their environment and family’s health.
    • Customers today expect cleaners to use natural, eco-friendly and less harmful cleaning products.
    • recent survey found that around 25% of respondents believed natural cleaning products were important. Consumers are becoming more concerned about their health, the environment, and the dangers of traditional chemical cleaners.
      • Chemical cleaners can irritate the skin, cause respiratory problems, or even death.
      • Conventional cleaners use over 6 billion pounds worth of chemicals and 30 million trees.
      • Indoor air pollution is up to five-fold more harmful than outdoor pollution.
      • Children are most at risk from traditional housecleaning solutions.
    • There is a growing need for cleaners who use natural, safer cleaning products for domestic cleaning.

    Why the Maids should be your first choice for house cleaning jobs

    • It is important to choose a company like The Maids when looking for house cleaners. They understand the importance of eco-friendly and safe cleaning. A house cleaning company with a track record and a sound business model is essential. There are also many growth opportunities.
    • All of this is possible because of our unique approach to residential cleaning. The Maids is the leading residential cleaning company specializing in cleaning for health. We are also well-versed next-generation residential cleaners.
    • What’s the best part about it? There are more than 170 franchises in North America, and there are always new locations. The biggest perk is the opportunity to advance and work anywhere you like. We think there are many other benefits worth your attention.

    Flexible, competitive pay

    • The Maids has the industry’s best pay and benefits. There are many opportunities to increase your income via regular reviews and our incentive program, like our referral bonus.
    • The typical pay schedule is every other Friday. However, with the MaidPay app, you can modify that schedule to suit your needs. The Maids allow you to get paid whenever you need it, whether every two weeks or daily.

    Scheduling in the Real World

    • As professionals, we understand that a work-life balance is a critical need. The Maids provides flexible, full-time work hours with little to no weekend or evening work so that you can enjoy the things that you love.

    Training and development

    • Because The Maids use proven methods like our 22-Step Cleaning Method, you can start a housecleaning job in your area without prior experience. We have over 40 years of experience cleaning houses in the U.S.A. and Canada and are uniquely qualified to teach the best house cleaning skills.

    Enjoy a Free Breakfast

    • We want mornings to be easier, so we offer a free breakfast for all employees who start their day at work.
    • The Maids has a competitive pay and benefits package unmatched by other residential cleaning companies. We know you may be interested in house cleaning jobs. Here are some questions to ask:

    Are you a hard worker cleaning houses?

    • Cleaning houses requires physical and mental effort, but it is possible with professional training and the right tools.

    Is housecleaning a worthwhile job?

    • Because residential cleaning is in high demand, house cleaning is a great job.

    Am I qualified?

    • Although house cleaning experience is welcome, our professional training will ensure that you are up to speed quickly. We want to hear from you if you are a fast-paced worker and can pass a background check.
    • Instead of looking for house cleaning jobs near you, become a professional cleaner in an industry that will offer many opportunities over the years. You will learn valuable skills and work with a dedicated team to help you build your future.
    • Each The Maids franchise is owned and managed by an individual. Franchise owners decide which benefits they offer to employees. Not all benefits are available at all The Maids locations. Contact your local office to find out which perks are available to employees in your area.


  • Cleaning Up After Christmas

    Cleaning Up After Christmas

    Many emotions can be triggered by the end of the holiday season. Most people feel one thing: the fear of cleaning up after their family and taking down all the decorations. It can seem overwhelming to clean up after Christmas, but it doesn’t have to be overwhelming.

    You might be asking yourself, “Where do you start?” These tips will help you stay organized. This blog post will provide 11 tips to help you clean up after the holidays.

    11 Tips to Cleaning up After Christmas What You Wish You Knew Before

    1. You should keep a “To Do” List. A list is the organization of your brain. The best projects are always started with a list. A list will help you stay on track, no matter how crazy you are about cleaning up after family gatherings. Before tackling the other Christmas cleaning tips, create a list and write it down.
    2. Every year, place things in the same place, e.g., Christmas boxes under stairs. It is difficult enough to clean up after Christmas. It’s not something you want to do next Christmas. It would be best to have a designated area in your basement, garage or storage.
    3. Containers with lids are a better option. Containers with lids make it easier to put away decorations. This not only helps your decorations to stay dry when they are stored, but it also makes it easy and doesn’t require a lot of effort.
    4. Donate or sell unwanted items before the cleanup day. Many of us have received gifts that we don’t know what to do. You can either sell them online, keep them for next year, or donate them to your local charity.
    5. Sort by size. You need to separate ornaments into three categories: small ornaments, medium-sized ornaments like big snowflakes, and larger items such as lights. It will make it easier to set up each holiday if they are separated during storage.
    6. Pro-tip: Ornaments can be delicate and need extra care. Make or buy an ornament box with honeycomb separators. This will ensure that each item has its place. To avoid damaging fragile items, wrap them in bubble wrap or acid-free tissue paper. Please keep them in their original boxes to prevent mix-ups.
    7. Avoid creating a mess with Christmas lights. Wrap the lights around empty tubes made from wrapping paper to prevent them from getting tangled. The cord should be looped around the roll starting on the opposite side of the plug. Next, insert the plug into the tube’s opening. You can also use paper towels if you have already thrown out your gift-wrap tubs.
    8. The tree should be put away. It’s an important part of your living space during holidays, but it can also take up a lot of space when you clean it and put it away after the holidays. Use a microfiber cloth to clean the branches of an artificial tree gently. Before storing the branches, let them dry completely. You can decorate with real trees by doing an internet search to locate a place that collects them for compost. It is a practical and eco-friendly option.
    9. Pro-tip: If you have enough storage space and an artificial tree, you can cover it with a large storage bag. You can easily find upright storage bags for disposable items online. Bags you can reuse Every year.
    10. As needed, make sure to have extra bags/boxes/bins. You may run out of containers at some point, either because they broke last year or because Santa brought new ones this year. You can reuse the boxes your presents came in and grocery bags, and other storage containers that will help protect your decorations.
    11. Pro-tip: To protect fragile decorations, you can use things around your house. Your wreaths can be hung on clothes hangers and covered with plastic bags. Then, hang them in your storage space. To protect your fancy candles against scratches, you can first put them in an old pair of pants. A small empty container of eggs can be used to store ornaments or other small knick-knacks.
    12. You can organize your gifts in a closet or another room. If you are like most people, you won’t be able to put away all your Christmas presents immediately. It would be best if you stored them until you can sort them. Do a quick sweep after all decorations, gifts, and boxes have been stored away.
    13. Make sure you do a quick cleaning before New Year’s Eve. Wipe down the kitchen counters and sweep/mop floors, if necessary. You’ll keep your place looking amazing even if the company drops by during the first week of January.
    14. The professionals are available. The floors and other surfaces are bound to accumulate a lot of unwanted clutter from family gatherings, holiday cookie crumbs, snowboot prints, and stray pine needles. Call The Maids to give your home a deep clean after Christmas. We will give your home a fresh start for the New Year.

    It is important to remember that next year will be easier if you take more care and thought into cleaning and storage. Get a jump start on your resolution to become more organized and follow our tips for a less stressful Christmas cleanup.

  • How to keep your New Year’s Cleaning Resolutions alive

    How to keep your New Year’s Cleaning Resolutions alive

    We have a long tradition of making resolutions at the beginning of each new year. Although we have great intentions, we sometimes don’t stick to our plans. There’s no bad time to start cleaning out your house, but it’s especially good to do so at the beginning of each new year.

    Imagine yourself in your best light. Instead of tossing and turning toys on the floor, you can go to bed with an empty sink. You have all the throw pillows in place, your coffee table is empty, and you have a clean floor for your slippers. The fresh scent of a clean home is wonderful.

    A clean home is not only about safety but also about your family’s health. Cleanliness can prevent infections and viruses from spreading. It also gives you the ability to concentrate on what is most important to you.

    You’re not cleaning because you have an obligation. You’re not cleaning out of obligation. Cleaning is a necessity.

    Make that resolution. New year, new house. This time, make it a priority because it will keep you and your family safe. These are some tips to help you keep your resolution for cleaning in the new year.

    Get rid of all the junk.

    You don’t have to start stuffing your bedrooms with new items you have acquired over the holidays. Instead, look at what you have. It doesn’t mean you have to get rid of everything, but take a look at all the things in your home. What have you not used in six months? What collects dust? Do your children have toys or clothes that they don’t use anymore? You have to get rid of all the extra stuff accumulated in your home.

    Pro-tip Goodwill doesn’t end with December. Many shelters also accept gently used electronics. Second-hand and thrift shops still accept clothing, toys and other necessities. Then, determine if you need or use all of your items and pay it forward.

    Take care of the small things.

    Once you’ve cleared out all the clutter, you can start to make a new resolution for 2019. You’re more likely than any other goal to succeed if you take small steps each day. You can make small changes that will have a huge impact. Dishes could become a daily goal if you measure cleanliness by the number of empty sinks in your home. Cleaning your home’s fabrics and emptying the trash cans could be a better place to start.

    Pro-tip: Only choose one goal at a given time and build on your progress. It’s harder to stick with your plan if you have too many goals.

    Take a look at what you might have missed.

    While we know that dishes should be washed at least once a week and vacuumed every other week, there are still tasks in the home we neglect to do, either intentionally or not. We forget to dust the end tables and leave the closet shelves bare; we don’t wash the curtains but do the bedding. Look around your home and take a look at the areas you are least likely to use. Dust the doorways and drawers. Clean under furniture.

    Pro-tip Wash all household cleaning tools with soapy water, clean the brushes and hoses of vacuums and wash your filters and hoses.

    Make a list.

    To ensure that you can tackle each task as quickly as possible, you could start by making a weekly list. If you’re looking for more detail, you can make a list each day of your week (or five out of seven days if it is a weekend). You can make your list as detailed or as general as you like, but it should work for you. It doesn’t matter how you do it; something is satisfying about checking off a box once you have completed a task you had been putting off.

    Pro-tip It helps to list all the tasks that need to be done each month at the beginning of your year’s cleaning resolution. You can then break down each task into daily and weekly tasks. In no time, you’ll be an expert!

    Make it a daily habit.

    This is the tough part. It is important to keep to your resolutions. You must dedicate 15-20 minutes each day to cleaning the areas you have promised. It doesn’t matter what time it is, so long as you do it when it suits you. This is how you add each task to your daily routine. Eventually, you’ll have the current task as part of your daily routine and be ready for the next.

    Pro-tip: Studies show it takes a roughly 22 Step Healthy Touch system to ensure that no dirt, dust or cobweb is left behind. Our trained professionals use the HEPA vacuum system to capture up to 99 per cent of pollen, allergens and bacteria. After every house is clean, you’ll feel better.

  • How to get oil and grease stains out of clothes

    How to get oil and grease stains out of clothes

    Grease and oil stains are among the most common laundry irritants. These spots not only stick out like a sore thumb to your clothes, but they are also notoriously difficult for you to remove.

    Laura Goodman (senior scientist at Procter & Gamble) says that these stains are due to basic chemistry. Most oils and greases are either semi-solid or solid at room temperatures, so that that removal will require warm or hot water. It all depends on the fabric. Goodman states that synthetic fibres such as polyester can be particularly difficult to treat because they attract grease and oil. These annoying stains are more common as synthetic fibres become more popular.

    However, it is possible to remove oil stains from clothes if you can time it correctly. Goodman suggests that you react as quickly as possible to remove oil stains from clothes. Ideally, this should be done as soon as the stain occurs. It will be much more difficult to remove an oil stain once it sets or dries.

    Here are the top laundry experts’ tips for getting oil stains out of clothes, whether fresh or set in.

    How to use Baking Soda for Oil Stains

    Patric Richardson is a laundry expert and owner of the Minneapolis-based boutique Mona Williams. Baking soda pulls oil from the fabric and into it. If you can’t wash something–like a heavy coat or a piece of furniture–Richardson recommends using baking soda as the first defence line before treating the stain. Here’s how:

    1. Use a paper towel or cloth to remove any oil.
    2. Sprinkle baking soda over the fabric. Let it sit for 24 hours.
    3. After one day, vacuum the baking soda and brush it away.
    4. Use a vinegar-water solution to spray the affected area.
    5. Use soap and a toothbrush to scrub the area. Rinse off.
    6. If the stain persists, repeat the process.

    How to use chalk to remove oil stains

    Richardson states that chalk should remove oils from clothes in the same way as baking soda: by pulling oil out of the fabric and into the cloth. However, he does not recommend chalk to remove set-in or large stains. This trick can be used for small grease splatters, like when you cook, and some grease gets on your shirt.

    1. Use a paper towel to remove any oil or food residues from the garment.
    2. You can cover the entire area with chalk and allow the oil to absorb for a few minutes.
    3. After the stain has occurred, wash the item as soon as possible.

    Step by step instructions on how to remove set-in oil stain

    Set-in oil staining can be daunting. These steps would help you if your oil or grease stain didn’t disappear immediately.

    Apply the stain to the fabric while it is still damp.

    It is not a good idea for your garment to be rinsed with water before you begin working on the stain. Richardson states that it is easier to work with dry fabric, as oil and water are incompatible. “So, when you wet the fabric, the water coats the oil around it, so there is no way to remove the oil.”

    Put a piece of cardboard under the stain.

    You can prevent oil from transferring to other areas of your fabric by placing a piece of cardboard between the layers of your garment. You can recycle an old delivery box or cereal carton from your home.

    Use a dry, clean cloth to remove the stain.

    It is important to remove as much oil as possible. Blot the fabric carefully so that the oil doesn’t get to other parts. A napkin, tissue or paper towel can also be used if you don’t own a cloth.

    Use dish soap to remove the stain.

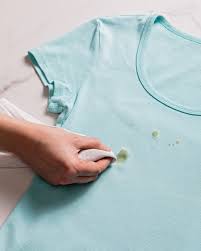
    Liquid soap cuts through grease on clothes just like it does for dishes. Apply a few drops of liquid dish soap to the stain. Then rub it in with your fingers. Allow the dish soap to sit for five minutes.

    Rinse with warm running water, and then wash as usual.

    After applying dish soap, wait five minutes before rinsing with warm water. Use your regular detergent and bleach for white items.

    Dry your item by drying it in the air or using a line dryer.

    Grease stains can be difficult to spot on wet clothes, so Goodman suggests waiting to dry the garment in the machine until you are certain that it is gone. Repeat the dish soap treatment if any stain persists after drying. Launder your garment again in hot water. Do not machine dry your item as the high heat could cause the stain to set, making it more difficult to remove.

    Is it possible to remove grease stains from clothes after washing?

    Although it is not ideal, Richardson claims that oil stains can be removed from the fabric after being washed and dried. It will just take an extra step. A dryer cycle heats the fabric and can cause discolouration. You’ll need to treat it again with an enzyme-based cleaner along with your usual pre-treatment.

    Is WD-40 able to remove oil stains from clothes?

    Strangely, WD-40 can remove oils from fabric. Richardson states that oily can remove oily. Richardson says, “The problem is that you need to remove the WD-40 as well, as it can sometimes leave its own residue.”

    Richardson recommends that you use an oil-based soap to remove stains.

  • How to Clean Outdoor Christmas Decorations

    How to Clean Outdoor Christmas Decorations

    Christmas is a time for family gatherings, good food, and many decorations. Many of us love decorating the holidays in our homes. However, others enjoy the idea of making an impact with outdoor Christmas ornaments. You will need to get large with lawn decorations that shine with Christmas cheer to keep up with the times.

    No more staking out the title of “Christmas light guru” in your neighbourhood. These days, decorating the exterior of your home for Christmas requires creativity, organization, as well as plenty of blow-moulded and inflatable Christmas lawn decorations. This holiday decoration is not cheap, so it’s important to learn how to maintain and clean your outdoor Christmas decorations.

    How to clean Christmas blow moulds

    Blow moulds are the lawn decorations that you see in classic Christmas movies. These light-up holiday decorations add a touch of nostalgia to lawns, from Santa Claus and his reindeer to snowman families. Traditional Christmas lovers won’t be satisfied with modern decorations, so they will have to stick to the traditional nativity scenes.

    Like the popular blow-up Christmas decorations, Blow moulds have to withstand winter weather, bright sunlight, and lots of dirt and grime. It’s crucial to learn how to clean and maintain outdoor Christmas decorations such as blow moulds to look their best year after season. This is how to maintain and clean your blow moulds.

    Use baby wipes, a soft cloth, and a mild cleaner to spot clean any heavily soiled areas of your plastic decorations. To prevent damage, you should clean your blow moulds gently, especially older ones. Many plastic Christmas lawn decorations are made from water-based paints to prevent damage.

    • Before you store your Christmas blow moulds, clean them thoroughly.
    • Before you store your blow moulds, let them dry completely.
    • To prevent plastic from degrading UV rays, you might want to keep your lawn decorations away from direct sunlight.
    • Replace the old lighting in your blow moulds with LEDs to give them new life.
    • Clear epoxy can be used to repair cracks in your blow moulds.
    • Use clear epoxy to replace broken pieces.
    • Spray paint for outdoor plastics can give faded colours a new lease of life.
    • Keep your Christmas decorations made from blow mould out of the elements in an attic, basement or garage.

    You’ll love the modern look of blow-up decorations. However, cleaning them is much easier than cleaning moulds.

    How to Clean Blowing Up Decorations

    The lawn’s inflatable holiday decorations are a modern version of traditional Christmas blow moulds. However, they are easier to store. Modern Christmas lawn decorations are often brighter and more elaborate than plastic counterparts. There are many Christmas decorations to choose from, including life-size nativity scenes and Santa’s sleigh with all eight reindeer.

    You need to know how outdoor Christmas decorations blow up, regardless of whether you have a few or many. There are two types of Christmas decorations: blow mould and blow up. Blow-mould Christmas decorations have a hard plastic construction, while blow-ups use pliable or vinyl, which is more durable and can be used for many years. This means you don’t need to worry about washing off paint and cleaning your decorations more aggressively.

    This holiday season, here are some tips to keep your blow-up decorations looking clean and presentable.

    • Use liquid dish soap and warm water to wash them.
    • Use an old toothbrush to remove stubborn stains.
    • When cleaning, avoid getting the battery pack and other electronics wet.

    You can keep your holiday decorations bright and clean by cleaning them regularly.

    How to Store Outdoor Christmas Decorations

    It was simple to learn how to clean Christmas decorations outside. All you have to do is know how to maintain your decorations’ holiday appearance while they are on display or in storage.

    • Keep your Christmas decorations up high and away from trees to prevent damage.
    • Before you put them away, give your blow-up decorations some TLC.
    • Take out any batteries and keep them safe for next year.
    • Before you let the air out, allow your blow-ups to dry completely.
    • Use strong, transparent adhesive tape to repair small tears or patch holes.
    • To prevent damage, roll up your blow-ups rather than fold them.
    • Keep Christmas decorations apart and away from sharp objects.

    These are some tips to help you get water out from inflatable decorations before storing them. If it is warm enough, you can keep them inflated and let them dry out in the sunlight. Let some air escape and dry your blow-up indoors if it is too cold.

    It doesn’t matter if you are a blow mould fan or not; it is important to know how to maintain your Christmas lawn decorations. You can find more holiday tips and help at our other holiday cleaning guides or our holiday cleaning service.

  • Damp Cloth vs. Dry Cloth: Which one is better for dusting?

    Damp Cloth vs. Dry Cloth: Which one is better for dusting?

    Dusting should seem easy at first glance. Grab your feather duster and your aerosol can. Start dusting until you are satisfied. It sounds simple.

    To get the best dusting performance in your home, there are only three ingredients: two pieces of cloth and some water.

    Why not use a dry cloth for dusting?

    Dry clothes seem to be as effective as damp cloths, but you don’t need to dry the area once you are done dusting. Although you can dust furniture with a dry cloth, it is not the best. Dry clothes do not remove dust completely. They only rearrange it to feel satisfied with the result, but then you find yourself returning to it again.

    What if a damp cloth is so superior that it warrants soaking up the dampness with a second cloth?

    Damp dusting: What Makes a Damp Cloth More Effective?

    Damp dusting is more effective than dry dusting because a damp cloth creates a capillary force for dust particles. The damp cloth pulls the dust particles in and lifts them from the surface rather than moving them.

    A damp cloth should be merely damp, not wet. When you dampen dust the area, water droplets should not be visible. You can ruin the sheen of your newly dusted furniture if there is any residual water.

    You should avoid leaving any residue behind after damp dusting to ensure a uniform look over the entire surface.

    Common Household Cleaning Tasks: The Right Way

    Cleaning your home can be difficult if you don’t have the right tools or a plan. Homeowners can clean these areas, but they won’t be done well.

    We have now covered the advantages of damp dusting over dry; let’s talk about the basics of dusting your house. These are some helpful tips that will help you get the most from your household cleaning.

    How to Properly Clean Baseboards

    You want to make sure your home is spotless when you have company over. This is usually when you realize that your baseboards haven’t been touched since the last time the company visited. The baseboard is one of the most easily soiled areas in your home, but it’s one that you forget about until you remember.

    Baseboards are often very dirty due to their proximity to the floor. These are the best steps to take when cleaning baseboards in your home.

    What tools do you need?

    Step 1 Lightly dampen the cloth with water or a multipurpose cleaner. Be sure that the fabric is not wet but just damp.

    Step 2 Move the cloth in continuous strokes from left to the right, right to left or left to right. The damp cloth will help remove dust and debris from the baseboard as you clean.

    Useful Hint: To avoid rubbing areas that have been cleaned with dirt and other debris, make sure you rinse the cloth after each cleaning.

    How to Clean Properly Vents

    It doesn’t matter if you’re talking dryer vents or refrigerators; it has likely been some time since you last cleaned the vents. Vents are essential in maintaining the functionality of your home appliances. Regularly cleaning them can extend their life expectancy.

    There are many vents in your home. They can be found everywhere, from the ductwork that circulates hot and cold air from your HVAC system to the back of appliances like refrigerators and microwaves. It can be difficult to clean vents because you don’t want to get dust or debris in the vent openings. These are some tips that will help you clean your vents.

    First, use a vacuum cleaner with a soft-bristle brush to lightly clean each vent. You should not push the bristles into vent openings. This will only push dirt deeper into the ductwork and appliance vents you are cleaning.

    Step 2 Wipe the vent’s surface with a damp cloth. If any of the vent’s openings have become clogged, wipe them with a corner from the damp cloth. To remove dust and debris, clean the vents side-to-side.

    A helpful hint: You can remove some vents for cleaning. Before you begin the cleaning process, make sure that the vent isn’t removable. If the vent can be removed, remove it and clean the area, it was covering.

    How to Clean Ceiling Fans

    Ceiling fans can make all the difference in cooling a house. Ceiling fans have many advantages and can help reduce energy bills. Ceiling fans do have some drawbacks. Ceiling fans can get very dirty quickly due to their position and constant motion.

    If not regularly cleaned, dust and debris can build up on the blades. This can cause the fan to lose its effectiveness. These are some simple steps to clean your ceiling fan properly.

    Step 1 Lay old newspapers or a clean cloth underneath the ceiling fan. This will collect any dirt or dust that falls while you clean.

    Step 2 Use a damp, mildly detergent-treated cloth to clean the blades and casing. Be sure to clean each blade starting at the center of your fan and working your way outward. This will ensure that dust does not accumulate around the fan’s casing.

    A helpful hint: You must thoroughly clean the fan blades on both the upper and the lower sides. This will ensure your fan blades perform optimally when you next use them. Additional passes may be required to clean the fan blades’ upper section to remove any dust buildup.

  • Winter Cleaning Checklist: Clean and Healthy Home

    Winter Cleaning Checklist: Clean and Healthy Home

    Winter Cleaning Checklist to Maintain a Clean, Healthy Home

    The holidays are over, and they have left behind a lot of mess. There is much to do, from the scattered pine needles on the floor to the rogue glitter and unseen dust. Although we associate spring cleaning with seasonal cleaning, many home re-sets can do a winter deep clean.

    Get rid of holiday decorations and get to work on your winter house cleaning checklist.

    Kitchen

    • Take a look at your pantry. Let’s get it all together. First, take out everything. Get rid of any expired items. Donate any items you don’t intend to use. You’ll be amazed at the neatness of a tidy space once you have organized the rest.
    • Clean up trashcans.
    • Clear out your fridge. Next, clean the shelves and racks with water, vinegar and baking soda. Use a microfiber cloth to wipe clean and return the items to their original places.
    • Clean Oven

    Bathrooms

    • Towel brushes should be cleaned and disinfected. **When was the last time you gave these wands a thorough cleaning? You won’t be able to answer that question. Instead, please place them in a solution of six to one bleach and water. After three minutes, let them sit down and then rinse. Let them air dry before putting them back in the holder.
    • Shower curtains and doors can be washed.
    • Replace or clean toothbrushes.

    Living Spaces

    • Clean under furniture. There’s a chance that cobwebs may have formed over the past few months. Turn over your living room furniture to get rid of cobwebs and other dust. Vacuum the floor underneath the furniture and the furniture itself. )
    • Get rid of cobwebs.
    • Clean floors Here are some tips on cleaning LinoleumLAminate, Wood.
    • Clean rugs. They may need it.
    • Dust all nooks and corners, such as baseboards and art.

    Bedrooms

    • Declutter closet.
    • Launder bedding and pillows
    • Vacuum under beds.

    Home Maintenance

    • Washing machine
    • Dust the ceiling fan blades.** Vacuum or clean the floor once you’re done.
    • Perform a complete furnace preparation checklist.
    • Test batteries for smoke and carbon monoxide detections.
    • Clear vents.

    You don’t want any of the dust from your house blowing around when the heat is on. First, remove the covers from your vents. After dusting:

    1. Wash them with mild dish soap and warm running water.
    2. Dry immediately.
    3. Use an attachment to vacuum the vent.
    4. Attach the vent covers.
    • To prevent illness from spreading, disinfect areas frequently touched in your home. It can be not easy to stay healthy in winter, but it is worth keeping your home clean. Learn how to disinfect.
    • Winterize your garage.
    • Use the washing machine’s cleaning cycle.
    • Focus on spring– Here’s where you’ll find it as the season changes.

    You’ll feel good, warm, and accomplished after you complete this winter checklist. If you find yourself overwhelmed by to-do lists and feeling uninspired, please call us! The Maids offer a service specifically designed to accommodate the changing seasons and their regular, excellent cleaning service. Get a free estimate by clicking here.

  • How to Clean Greasy Vents

    How to Clean Greasy Vents

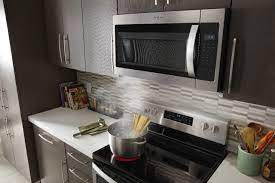
    The microwave has a way of simplifying life. Thanks to their fast healing abilities, moms worldwide can enjoy a cup of hot coffee. Microwaves are used daily for reheating mugs and meal prep. This can lead to a lot of mess.

    Microwaving is known for splatter. It can be difficult to get rid of because it is greasy. It’s better to close the door and hope someone else will clean it up. These are the steps to clean your microwave properly. We will show you how often and should be cleaned, including the frequently forgotten microwave vents.

    Cleaning your Microwave: The Basics

    It’s easy to clean up the microwave mess. To keep your microwave area clean for food preparation, you should do this daily.

    1. Use warm soap and water to clean the cloth.
    2. To clean the microwave more thoroughly, heat some water and vinegar in a ceramic bowl for about 2 minutes. Allow the steam to spread throughout the microwave’s interior. Next, use the steam to cover all surfaces. Because it leaves no white residue, a microfiber cloth is better than a paper towel.
    3. Take out the microwave plate and the carousel. These can be cleaned with a microfiber cloth if you have used the vinegar solution trick. Use warm soapy water to wash the sick. Once they are dried, return to the microwave.

    For a detailed guide on everything microwave cleaning-related, click here.

    How to Clean a Microwave Vent

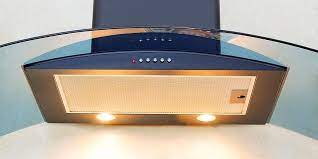
    Deep cleaning is something you may be new to. Two primary vents are found on most microwaves. One is located above the door, and one is underneath. They should be cleaned at least once a month. You’re in luck if you haven’t cleaned yours before. We’ll show how.

    1. First, unplug the appliance.
    2. The top of your microwave might have a plastic grill. It may be necessary to remove this vent. After removing the vent, wash it with hot water and dish soap. Then, scrub! To make it easier to scrub stubborn grease stains, you can add baking soda to your hot water.
    3. Once the vent is completely dry, could you return it to the machine?
    4. You can usually remove the vent from under your microwave by simply sliding it to one end. To clean, follow the steps below.
    5. You can clean the glass light cover with a microfiber cloth while the filter is drying.

    These vents should be cleaned once per month to ensure the exhaust fans work well.

    Hack #1: Clean with Vinegar

    1. Fill a large, microwave-safe bowl with water and two tablespoons of vinegar. To reduce the vinegar’s smell, you can add one drop to your preferred essential oil. Place the container into the microwave.
    2. For five minutes, turn the microwave on high. It should get very steamy inside. Keep the door closed for at least fifteen minutes to ensure that all baked-on grime is removed.
    3. Remove the container carefully. Warning: It could be hot.
    4. Take the turntable off and clean it with a dry cloth.
    5. Use paper towels or a rag to clean the microwave’s interior. Be careful not to get liquid in the vents. Use a sponge that has been dipped into the vinegar/water solution to remove any remaining spots.
    6. The turntable should be replaced.

    Hack #2: Cleaning with Lemon

    1. To make it mushy, squeeze one lemon. Cut it in half.
    2. You can place about 1 cup of water into a large, microwave-safe bowl.
    3. Take as much lemon juice from each lemon half and add it to the water.
    4. Add the lemon halves to the water.
    5. Place the container in the microwave and heat it for 5-10 minutes.
    6. Allow it to stand for five more minutes. Next, open the door and remove the bowl. Warning: It may be hot.
    7. Take the turntable off and wipe it clean using a dishcloth. Next, use the dishcloth to wipe the inside of your microwave.
    8. The turntable should be replaced.


  • How to clean and restore carpet even if it’s old, stained, or disgusting

    How to clean and restore carpet even if it’s old, stained, or disgusting

    I have good news for you if your carpet is stained and discolored. You can take steps to make your carpet fall in love again.

    When we renovated our house years ago, some carpets were replaced with hardwood. It was quite amazing. It was obvious that dirt and dust had accumulated on the wood floors. Although I didn’t see it, it was evident that it was there. It was a wake-up call to see the old carpet taken away, rolled up, and hauled away.

    Let’s not forget this: Carpet hides dirt, regardless of color or brand. This is not a good idea.

    The carpet is warm and cozy, which I love, especially in a bedroom. I feel slightly creepy thinking about what it contains. I used to believe that vacuuming every once in a while was enough. Now, I know better.

    Despite its ability to hide and harbor dirt, I am not ready to give up the carpeting in my home. Even if I did, I can assure you that I would soon be looking for area rugs. What is the difference? Carpet is carpet, and if it’s not taken care of properly, it can become shabby, gross, and ugly.

    What about those stains? Spills on wood floors are quickly cleaned up. However, carpet stains and spillages are not easy to clean up. I used to ignore them. This was a hard lesson that I learned the hard way. Even though I don’t vacuum every day, I can assure you that there aren’t any stains or dirt paths on my carpet.

    Vacuum Regularly

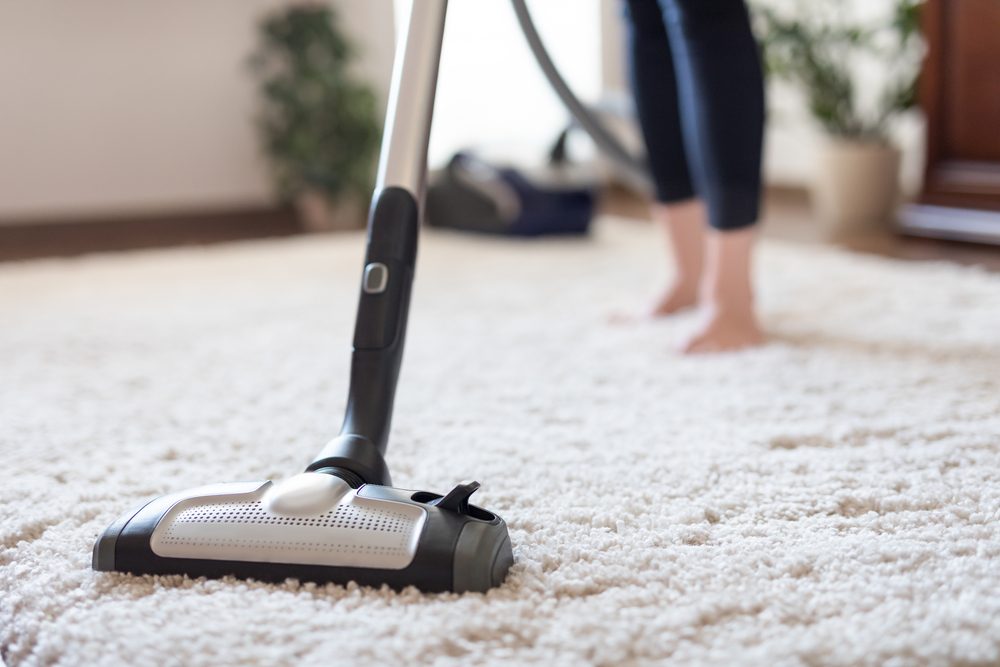
    You should vacuum your carpet as often as you mop, sweep, or hard dust surfaces. You may not be able to see dirt, hair, footprints and debris. You can make your carpet look disgusting by allowing any of these things to get into the carpet pile.

    To remove dirt, dust and grime quickly and easily, you will need a vacuum that has super-strong suction. It is best to vacuum once a week. Twice per week is better. Vacuuming heavy traffic areas daily? Even better. This routine is the best way to vacuum the carpet.

    Treat Spots Right Away

    Carpets are prone to staining from sticky liquids, food and grease, as well as pet urine and excrement. You don’t have to hate your carpet.

    Stains can be left for any length of time.

    Wash Your Hands Frequently

    Every three months, shampoo and steam clean your carpets. It is a smart decision to invest in your carpet cleaning machine. Instead of hiring professionals, the machine will pay for itself right away.

    Hoover steam vac is the best machine. It’s been with me for more than 12 years, and it still works as well as when it was brand new. It’s beautiful! I recently bought the 2021 version.

    The Best Thing I Ever Bought

    My Hoover steam vac is the best I have ever bought. I purchased it on Dec. 7, 2008, and it’s still in my Amazon order history. It costs $147 plus shipping. Hoover still performs flawlessly, all these years later. Hoover is my lifesaver. The Hoover people have updated this machine over the years and given it a new title (on the right)–still an incredible product.

    It’s Been a Long Time

    If your carpet is so old that you don’t recall when it was last cleaned, or if it is extremely dirty and smelly, hot water alone will not be enough. To clean your carpets, you need to use a commercial-grade shampoo product. You can also make it yourself. Be prepared to rinse, rinse and rinse again. Every molecule of detergent or soap applied must be extracted before it reaches the carpet. Any soap residue will attract dirt, dust and grime.

    DIY Carpet Shampoo Solution

    One cup Oxiclean Moisturizer (NOT Oxiclean detergent), 1 Cup Febreze, and 1 cup white vinegar. Add the ingredients to the carpet cleaning machine. It will clean your carpets and also deodorize them. The carpet will still smell slightly of vinegar after it is dried. To be safe, test the carpet in a quiet area first. All carpets should be tested in this manner.

    Clean

    First, clean the carpet. You can do as many repeats as you like. Follow the Nok-Out protocol.

    Neutralize

    Nok-Out is pH 8.5 and best suited for use in an alkaline environment. If you have previously used vinegar or other acidic cleaning products (e.g., to treat spots or spills), you must neutralize the acid. Spray Nok-Out onto the area using a spray bottle.

    Let the solution dry before you continue with the odor removal process. This will remove any acids from your carpet. Nok-Out can then work efficiently and effectively.

    Try it!

    Always test the product in a dark, private area such as a closet. This applies to any cleaner, deodorizer or other product that you haven’t used before. Before you apply it in an open area, you need to see how the carpet (or upholstery) reacts.

    Water temperature

    To use Nok-Out in carpet-cleaning machines:

    1. Add 1 to 2 cups of water to the reservoir.
    2. Add enough room-temperature liquid to make one gallon (128 ounces).
    3. Do not use Nok-Out in boiling water.

    Let it penetrate

    While you are spraying the carpet, push the shampooer forward. Do not vacuum the cleaner yet. Spray the entire carpet and allow Nok-Out time to penetrate the carpet fibers and oxidize the floor substrate and pad.

    Extract

    Once the waiting period is over, you can begin the extraction process by pulling the carpet cleaner backward. This forces all liquid back into your cleaning tank. Use overhead ceiling fans floor fans and turn the heating fan to “On” or open windows to dry quickly.

    You can repeat the process if a second application is required.

    Last thing

    Do not choose a color to “hide dirt” if you’re looking to replace your carpet. A color that can highlight every dirt, spill, and stain is what you want.

    These things should be visible to take immediate steps to clean them.

    It’s not unusual to have a bad opinion of the carpet in your house. You might need to do a few more times of vacuuming, stain-removing and deep cleaning before you can fall in love with your carpet again.

  • Tips for installing wooden flooring.

    Tips for installing wooden flooring.

    Are you unsure how to tell the difference between hardwood and laminate flooring? We have compiled a guide to help you make the right choice.

    It cannot be easy to choose the right wooden floor for your home’s interior. We make the selection process much easier for you because we know that making the wrong decision can be costly.

    This is our guide to wood flooring, with a few tips and tricks for installing them.

    There are two types of wood flooring: Hardwood is made by milling solid timber and can be purchased in both unfinished or stained options.

    Tip You can choose the color to stain it by buying it unfinished. Prefinished versions are easier to install and save time.

    Engineered Hardwood: Layered hardwood with a plywood backing and a medium-density fiberboard backing

    Tip Because it mimics wood’s natural movement, it is extremely stable and well-suited for high-moisture environments.

    Bamboo: Bamboo fibers are compressed under extreme heat and pressure to make this flooring option. It is twice as tough as oak.

    Tip This is a very sustainable option and also makes it very durable.

    Laminate This laminate is popular because it is easy to install and maintain and withstand almost any environment.

    Tip It resists staining, scratches, and fading. Available in high gloss, distressed and hand-scraped textures.

    Vinyl Plank: These planks are ideal for high-moisture areas like bathrooms and kitchens. They look just like tiles or wood. They are extremely durable and feel great underfoot.

    Tip It is easy to install, as it comes in a simple peel and sticks or click-together format.

    Wood-look Tile: These tiles are as beautiful as wood and as practical and useful as tiles. They make smart choices for the bathroom and kitchen.

    Tip – Makes an amazing kitchen backsplash.

    Cork flooring is made by removing the bark from the tree and leaving behind a protective layer that allows the tree to grow again. Cork floors are soundproofing, natural cushioning, and excellent heat insulation.

    Tip This flooring is great for quieting your conscience and calming your home.

    Brands to watch out for:

    Pergo is very popular and offers a variety of options. GreenLam’s Mikasa also has a beautiful range. Squarefoot, one of India’s oldest wood flooring companies, offers LEED-certified eco-friendly options.

    Do’s and don’ts in the installation:

    Before you start to install the flooring, plan well. If you choose a flooring option that reacts to moisture, leave a half-inch gap between the floor and the wall. You can conceal this with base molding.

    Always order 10% more material than you estimate. On average, there are approximately 7% to 10% wasted areas due to cuts, planks damaged during installation or courtesy measuring errors.

    * Lay the floor from the wall to the floor, starting on the longest side.

    * Use an underlayment product for hardwood, laminate, bamboo, and vinyl flooring to dampen sound, protect against moisture, and provide thermal insulation. They are easy to install and come in three to five feet wide rolls. These can be used in floating, glue-down, or nail-down installations.