Category: Cleaning

  • How to Clean Your Reusable Bag!

    How to Clean Your Reusable Bag!

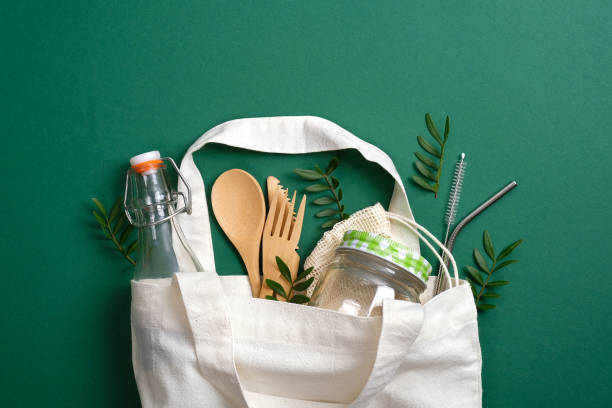
    Do you clean your reusable bags? Most likely not. But let’s face it: they are disgusting!! Disposable bags are fantastic, and yes, they can carry more than other bags, are stylish, and won’t break in half, making you look like an idiot at the end of the street with your smashed egg carton and spilled milk. Have you ever considered why plastic bags became so famous? One word is disposable.

    Imagine your reusable bags as underwear. They must be cleaned as they carry a lot of bacteria and dirt and could eventually cause food contamination (I think you’d be transporting food items around inside bags).

    Loading, take a moment to reflect on how dirt these items become! You can bring your cheese, meat, fruits, and vegetables in the same containers weekly.

    They sit there, and you believe that they’re invincible. They aren’t. Gross. You’re probably shivering now! If you want to learn more about this research, here’s the link.

    Make sure to look into Maker’s Clean’s line of high-end products. From microfiber cloths to Maker’s Mop, they offer a fantastic line of premium products that can help you improve your cleaning skills to a higher level!

    Research has shown a high level of yeast, mold, and bacterial growth in bags that can be reused. If you keep meat in your bags, you might also be susceptible to E. coli or salmonella.

    According to this research, an estimate states that only 15 percent of Americans clean their bags. What can the consequences of not washing your bags lead to? A raging case of food poisoning. Have you ever suffered from food poisoning? Are you aware of what happens in your body?

    Okay, enough of the paranoia. Here are some suggestions that you could do to ensure they are healthy and free of germs:

    Color the bags with a code for fish, meat, poultry, dairy, food preparation, and fruits. This can help prevent cross-contamination. It is possible to use bags from different stores instead of the color code or mark permanent labels on the bags to ensure easy separation.

    Place all raw foods in plastic bags before putting them into the tote bag (doesn’t this sound like a contradiction to a no-plastic bag policy?).

    Do not put bags inside the trunk. An experiment showed an increase in the temperature of the box is an ideal place to breed additional bacteria, in the range of 10 times the number of bacteria in less than 2 hours.

    Nylon and fabric totes are simple: put them in the washer with your jeans or towels and let the machine complete the job. The smell, stains, and bacteria will be taken care of in the wash cycle.

    When the bags are made of recycled plastics, fill the sink with hot water and add two tablespoons of dish soap and 1 cup hydrogen peroxide. Then, soak it over 15 minutes. The soap will wash away scents and dirt. The hydrogen peroxide will clean the bags and help remove the staining that is difficult to remove. Take the sink out and shake the suitcases to dry. Then hang them and let them air dry; they’ll dry very quickly. If you place these bags into the washer, the bags will begin to pill.

    I believe it’s essential to be mindful of the environment. However, I must admit, when I look at the figures from this study, I’m a bit shocked that I carry these bags around and miss the convenience of plastic bags at the time (not to forget the no-cost bag for trash). I don’t wash my loads frequently, and evidently, much additional effort is required to keep these bags clean. But the time is shifting, and it’s the most ethical thing to do. I have to keep up with the times and wash my clothes!

    What is the reason I should need the bags?

    I’m located just away from Toronto, and Toronto has made a few changes to our shopping habits over the last year or more. The mayor was trying to get consumers off of their squandering plastic bag habits, and now we must pay 5 cents to buy plastic bags to buy groceries (known in the local language in the city as Bag Tax). The Bag Tax has become a controversy in Toronto not because it’s not an excellent environmentally friendly idea but because store owners can take 5 cents, and it’s an additional source of revenue for the store owners. Torontonians were initially told that the money would be used for other environmental initiatives, so people are outraged over the nickel-per-bag problem. The city doesn’t have a way to calculate the amount of money earned from sales on bags, and so puts it in the hands of the store owner to pay the cash (not taking place). City councilors are receiving several complaints from constituents due to this, and many people view this as a prank.

    It is working to some extent since people across the Greater Toronto Area are using recycled bags and totes, as well as fewer plastic bags (and curiously, the sales of packaged kitchen garbage bags have suddenly increased). Businesses are handing these bags to promote their products (similar to Lulu Lemon), and grocers charge around a buck for you to purchase one. The story’s moral is to get involved in the political arena or open a shop in Toronto and make a lot of bags. Later, take a break in Hawaii. Also, wash your loads!

  • How to Clean Headphones, AirPods, Earbuds, & Headphone Jacks

    How to Clean Headphones, AirPods, Earbuds, & Headphone Jacks

    I am in love with the sound of my Airpods and my large headphones! When I’m taking walking or working out, or working out, having music playing while I work out is highly stimulating and enjoyable. It’s like we each have our favorite headphones or earbud preferences. Whatever your choice of headphones, we all know they get …. greasy.

    As disgusting as it may be to contemplate hearing, our ears can be dirty, and ear wax and other debris from our ears get into our headphones. It’s a total scourge. However, it could also result in ear infections in sporadic instances. Cleaning your headphones is essential! This article will discuss:

    Suppose you’ve not yet checked out our iPhone Care and Cleaning Guide post. But first, remove the wax off your ears, listen to the sound, then make sure your headphones are clean and squeaky.

    How to Clean AirPods

    There’s nothing more frustrating than pulling out your AirPods only to find large globs of wax on the inside of them. Yuck! It isn’t very comfortable to admit you’re still listening to the Spice Girls. Fortunately, cleaning AirPods is quick and straightforward.

    Take the microfiber fabric and any other tool that has an end that is fine, such as a bobby pin, needle, or toothpick. Make sure to dampen your microfiber cloth before you wipe the exterior of your AirPods, and be sure not to get water inside any of the holes, as it could cause damage to the AirPods.

    Use your well-crafted tool to remove the earwax from the speaker hole carefully. Be careful not to damage the speaker. They are very delicate! If you own AirPod Pros, you need to remove the silicon tips and wash them gently. Dry them with a microfiber cloth. D.O.o not reattach them until they are scorched.

    How to Clean Earbuds

    Cleaning earbuds are a lot like cleaning Airpods. Start by using a moist cotton cloth to clean the exterior of the earbud. Be cautious not to let any water inside the openings. After that, employ a fine instrument such as a bobby pin or toothpick to scrape the earwax off the speaker. It’s important to note here: be cautious when you do this to ensure that you don’t harm the speaker, which could damage the earbuds!

    If you’re worried about damaging your speaker, use a clean toothbrush. Ensure the toothbrush is dry, and then gently brush the wire mesh. With patience, this will remove the gunk. But you might require a small tool to access the corners.

    How to Clean Headphone Muffs

    Perhaps you’re not an earphone person or gal but prefer large headphones. That’s great! They are more beneficial for your ears over the long haul. In addition, they will make you look stylish! But I digress. It’s straightforward to clean the muffs of your headphone. They aren’t as filthy as earbuds or Airpods, as they don’t enter directly into your ear.

    If the headphones are equipped with removable muffs, take them off. Then, you can use a cleansing toothbrush and dry-clean your headphones. After that, grab a Microfiber cleaning cloth and the preferred cleaning product. Some people recommend using diluted rubbing alcohol or hydrogen peroxide. I like mixing vinegar and water. The best cleaner for you will depend on the materials your headphones are made from.

    Lightly dampen your microfiber towel with the chosen cleaning solution and begin to work. Carefully wipe the entire surface of your headphones, including the band, ensuring not to leave water in any openings. Dry using a different microfiber cloth, but don’t apply until you’re confident you are 100% dry.

    How to Clean A Headphone Jack

    Cleaning the headphone jack could be a good idea to avoid purchasing new phones or an mp3 player (if you utilize them!). Dust and debris can build up in our headphone jacks and interfere with the connection between the headset and the device.

    If your headphones don’t connect, Try cleaning the headphone jack before you toss your iPhone into the trash (OMG, you shouldn’t do that!). Compressed air can, which you can use to clean keyboards on laptops, is an excellent device to clean the headphone jack. (P.S. We also have a post on Cleaning A computer.)

    The majority of compressed air cans come with a tube or nozzle. It is aimed at the headphone jack and blasts the air. You should blast out dirt and dust as well.

    If you do not have compressed air, Try using a paperclip. The paperclip should be unbended so that it’s straight. Use this method carefully to clean all accumulated dirt in the headphone jack. Be careful; it’s straightforward to scratch your connector and render it non-functional. I’d test compressed air first.

    Cleaning Headphones the Right Way

    Walk down the street to your favorite tune, confident that your headphones are clean. You can also use them to avoid people at the station. They’re your headphones. They are the only ones!

    In any case, I hope that you found this helpful article. I’m going to wear my headphones right now and pretend I don’t hear my husband, Chad, calling for assistance in the kitchen. Also, don’t forget to dust your phone case and phone to match your sparkling headphones! Check out how to clean and Clear the Phone cases for all the information.

  • How to Clean A Leather Purse or Bag

    How to Clean A Leather Purse or Bag

    Many people have leather but do not know what to do with leather. Cleaning leather should be done correctly, or you risk damaging your leather boots, jacket, or purse. Fortunately, leather doesn’t require washing as frequently as other materials, such as wool or cotton.

    But when it’s time to clean your leather purse, you need to be sure that you know how to clean it. That’s where I can help! Today, we’ll discuss how to clean your leather bag inside and out. You can also use these tips to clean leather bags too!

    Loading adEmpty Your Purse

    Before you can begin cleaning the leather, take your bag out of the closet; I prefer to sit at my dining table and clear everything while doing this. This way, I can list what’s in the room and what I should put.

    An ongoing series about decluttering our home’s various spaces is titled The Ten Things to Throw Out. But what about our bags? I don’t know what you think. I typically discover three lip balms that are empty, the receipts of I don’t see the date, food wrappers, and tickets (like trash in the literal sense) when I go through the large bag toss.

    Therefore, before cleaning the materials, take a look through your purse. Create three piles: things you can throw away to move and those that return to your wallet.

    Cleaning Purse Liner

    After everything in your bag is organized, it’s time to begin cleaning the purse. It’s the first thing to do is clean your purse’s liner.

    As a mom and hungry person, my purse is frequently full of snacks. Foods equal crumbs. My wallet is like the bottom of my couch. Crumbs, crumbs, crumbs!

    Many alternatives are to clean your purse liner. First, if you spot lots of dust, you can use a lint roller to collect dust, dirt, crumbs, and other things that may be within the. Clean it up using a dampened cotton cloth. Pat dry.

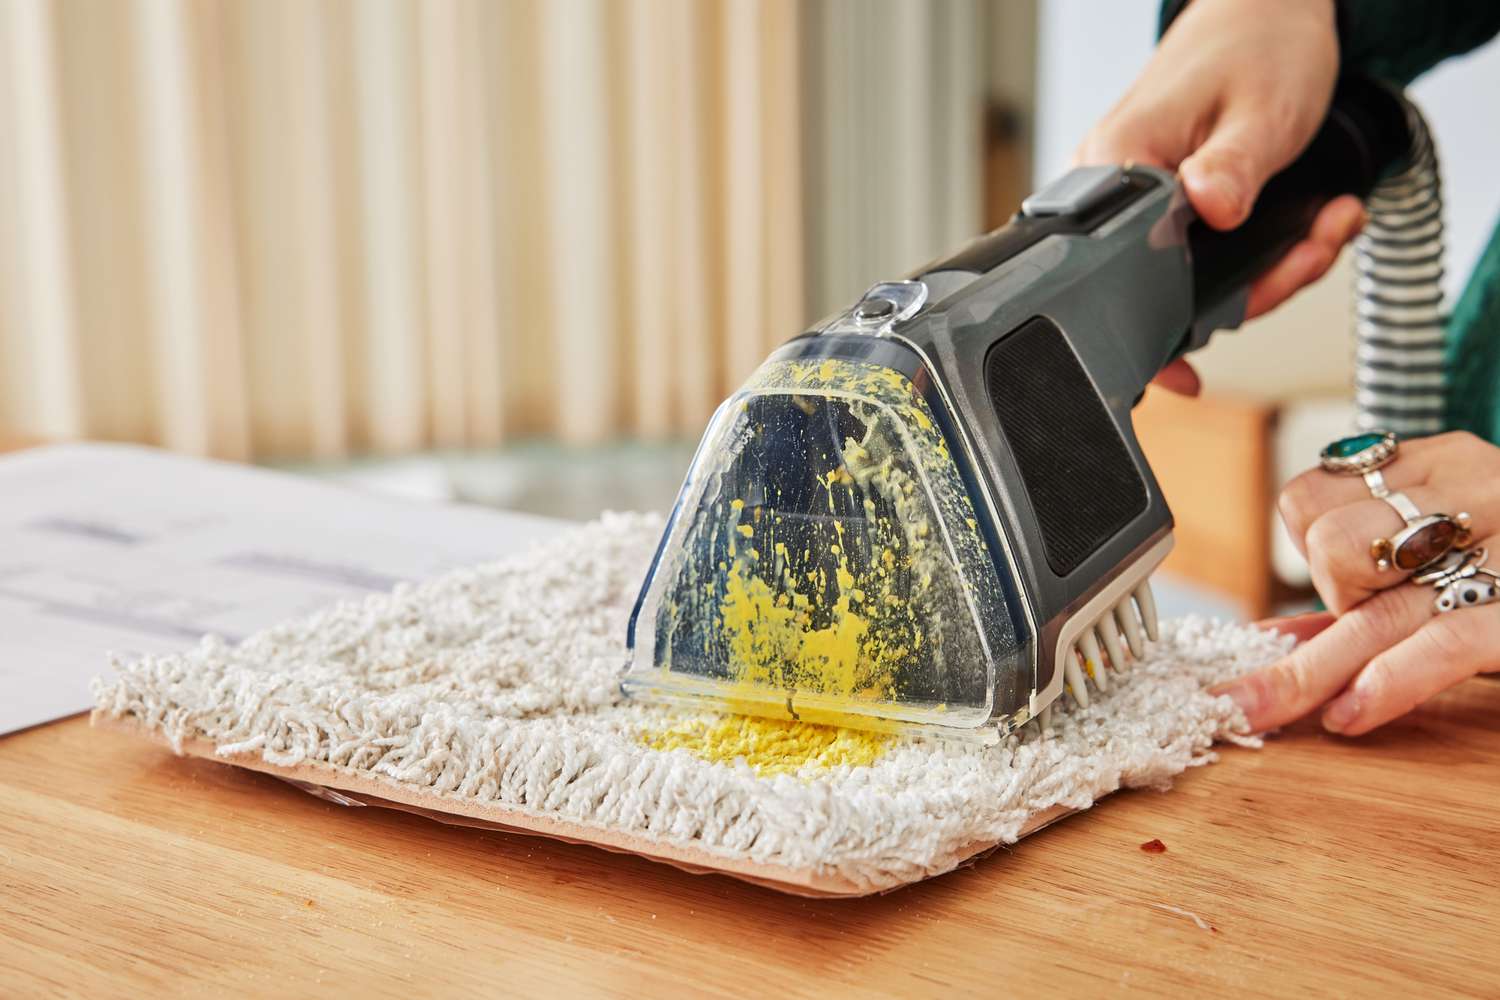
    If your purse’s interior is clean, you can ditch the lint roller and use this Microfiber fabric instead. Consider using the fabric brush attachment with your vacuum for heavy-duty deep cleaning of your purse’s liner. It is a bit odd to clean your wallet. However, this is a charm regarding heavy-duty cleaning requirements.

    How to Clean A Leather Purse

    For those who think, Okay, tell us how you can clean your leather, here’s the! Clean a white cloth, then add some drops of premium cleaner to the leather. Disclaimer: do not use a color-coated material for this task because the fabric’s color could transfer onto the leather.

    With a second soft cloth, rub your leather. This involves moving the fabric vertically across the leather as a shoe shiner would do in an old-fashioned film. This will soften the leather and provide it with a nice shine.

    After that, you should maintain your leather’s condition to make it look good and prolong its life. Make sure to apply a top-quality conditioner for leather; otherwise,, you risk damaging your bag or purse.

    Also, clean the buckles of your purse. It’s pointless taking care of your purse’s leather if you don’t polish the buckles made of metal. The microfiber cloth is perfect for this. Give those buckles and other metal pieces you have a good shine.

    How to Store Leather

    Conditioning, cleaning, and buffing your bag or leather purse every month is the most effective way to maintain its appearance and extend its lifespan as long as possible. However, don’t forget to do it after you’ve finished posing with your new bag; you’ll need to store it securely to ensure it is in good shape.

    To keep your purse in its shape, place tissues inside when you’re not using the bag. To keep the strap in good condition, do not hang your purse. Instead, place it on a rack. Also, never put your leather bag in an unprotected plastic bag.

    Plastic can adhere to leather, leaving a residue. In addition, it retains moisture, which could cause mold, mildew, and even yellowing. Make sure your purse that is made of cotton. I love using old pillowcases as a way to do this. They are great as they keep my leather bag secure, and reusing and recycling old objects can keep them from being thrown away.

    How to Clean A Leather Purse

    I’ll just let it be known that leather can be difficult to clean. However, if you can handle it, you’ll be able to save time and money since you won’t need to change your leather as often.

    If you have additional leather-related questions, post these in the comment section. If you’ve got any great tips for cleaning your leather, send us your suggestions. Our Clean My Space community wants to hear from you!

  • Ways to Use Microfiber Cloths

    Ways to Use Microfiber Cloths

    I remember the first cleaning cloth I had when I began the cleaning service in 2006. It was an old, sad, recycled rag in a giant plastic bag filled with clothes from a janitorial supply company.

    As a new cleaner, I could tell this rag was a disaster. Therefore, I contacted the company selling janitorial supplies. I told them, “You’ve got to get me something better,” the company replied, “If you’re willing to invest a bit more, you can try this high-end microfiber and see how it compares to other rags.

    That was the day when the game changed. It was love at first sight, as some might consider it. Microfiber made my work so much simpler. I achieved better results in a fraction of the time of traditional cleaning rags. This is one reason why I’m super-loved by microfiber. However, not all microfibers are high-end, professional-grade microfiber.

    But it’s difficult to find top-quality cleansers made of microfiber. I founded Maker’s Cleaning, my own cleaning products business. I designed high-quality, accessible products that could simplify cleaning and keep rags from the garbage bins.

    A few of the Microfiber cloths for cleaning I have around my house are more than ten years old and are still in use! A typical cleaning rag doesn’t last half as long before being thrown away in the garbage. That’s why Melissa, get to the purpose in this post! Okay, the purpose of this is that today I will show you 27 ways to clean microfiber cloths. So let’s begin!

    Bathtub Wipe Down

    If you plan to perform the maintenance cleaning of your bathtub, that gives it a good clean but aren’t dealing with lots of soap scum. Microfiber is the best choice. Spray your bathtub with a multi-purpose cleaner, and wipe the tub with a microfiber towel.

    Bathroom Floor Cleaning

    I’ve indeed been cleaning my bathroom floors using microfiber towels for years. I use the same microfiber cloth to clean the sink and wipe my feet. I employ two towels to scrub the floor and clean the baseboards.

    Clean the Sink

    Have you ever wondered how professional cleaners achieve that shine and high-polish look on sinks? Since I am a certified cleaner, I can assure you it’s microfiber. These cloths are highly absorbent, which means they’ll take in all that moisture and leave no streaks of dirt behind.

    Polish Mirrors

    I love using Maker’s Clean Glass and Electronics Cloth cut into quarters. Then, I prepare the cleaning solution with equal parts water and vinegar and spray it onto the mirror. Then, I create an S pattern using my cloth, ensuring no marks or streaks are behind.

    Clean Cupboards

    I am a sucker for cleaning doors to the cupboards with microfiber towels. I employ a general, all-purpose cleaner as well as a folded cloth. As always, I use an easy S pattern. This removes all marks, stains, and dirt from my cabinets without destroying the surface.

    Dry Dishes

    Drying dishes can be a hassle, and regular towels end up soggy too fast to dry many dishes. I use my Maker’s Clean Waffle Microfiber Cloth when cleaning dishes. It’s very absorbent, extensive, and dries quickly, making drying dishes easy.

    Drying Shower Glass

    When you’ve cleaned your bathroom, the glass may be streaked when your shower isn’t dried correctly. This is the time that it is that the Maker’s Clean Microfiber Cloth is handy. I move from the top to the bottom of the glass shower with my microfiber cloth to get a smooth, streak-free shine.

    Clean Baseboards

    I have seen someone else using an old towel to clean her baseboards! The microfiber cloth can remove dust without leaving marks, and you can toss it into the washer for use again. It’s a win for everyone.

    Washing Machine Clean and Dry

    The drum cleaning of washing machines is much simpler with a huge microfiber cloth. Additionally, when I clean the gasket on my washing machine, I dry it with the help of a microfiber cloth to prevent mold buildup.

    Clean the Stove

    Using microfiber towels to clean ovens shocked me. However, they do the job very! Clean your oven with an oven cleaner that is of high quality, and allow it to sit for a bit. Watch your microfiber cleaning cloth take on the work for you.

    Deep-Clean Oven Burners

    To clean a cooktop that needs make us,e of an enzyme-based cleaner. It should be left for a minimum of five to ten minutes before wiping with a microfiber rag. Need more oven help? Read How to Clean Oven Racks.

    Car Cleaning

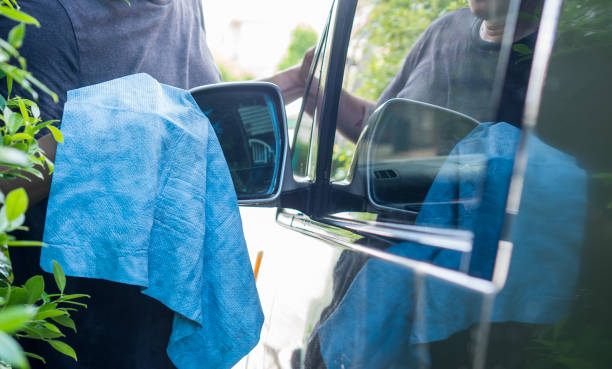
    Anyone who previously had to clean a vehicle knows how fantastic microfiber can be for this task. It can help remove all dust and dirt. Using general-purpose cloths to clean your dash and flat weave windows with cloths is possible.

    Eliminate Scuff Marks

    Marks of scuffing on painted surfaces can be removed using a microfiber cloth and little baking soda. Wet your cloth using a small amount of water, then sprinkle small amounts of baking soda. Try a small area at first. If you are successful, scrub it and clean it off.

    Clean TV Screens

    I wouldn’t suggest the use of any item on television screens. Instead, you can employ a flat microfiber cloth and weave it using an S-shaped pattern from the top to the bottom.

    Countertops and Surfaces

    A microfiber cloth is the ideal cleaning companion to any counter, which includes granite. Spray whatever cleaner best suits the countertop, and then use your material in an S shape to keep your counter looking sparkling and clean.

    Leather Cleaning

    Microfiber is also safe for use on leather! It can be used dry, or add a small amount of leather cleaner on the microfiber cloth before cleaning your furniture or furniture made of leather. Choose a fabric with the same or similar shade to your leather to avoid the transfer of color. Check out how to clean a leather purse for more information on how to clean leather.

    Wipe Baby and Toddler Items

    If you’re seeking a non-chemical cleaning method, consider using a microfiber towel and water to wash down the items in your baby’s space. For more chemical-free baby clean-up ideas, refer to Cleaning a Baby’s Changing Table.

  • How to Clean A Burnt Pot or Pan: Cleaning Hacks

    How to Clean A Burnt Pot or Pan: Cleaning Hacks

    This happens even to the most seasoned of us. You’re making dinner in your favorite pan or pot, but your phone is ringing, your child gets upset, or your favorite show Su, survivor, is on, and you’re distracted. Then, before you realize it, the food and your cooking pot are ruined.

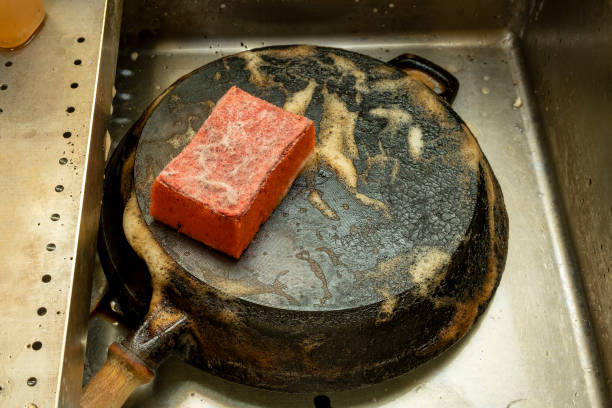
    I’m often asked to clean an unburnt pot. There are many ways to clean pots that have been burned, and the most effective method for you will depend on the material the pool is made from and the manner you use to burn it. Sometimes, cleaning it with vinegar or baking soda is your best option. Sometimes dishwasher tablets could be the answer!

    Let’s look at all the methods to clean an unburnt pot to help you make the best choices and keep your kitties safe! Before thoroughly cleaning your bank using one of these methods, I suggest putting a tiny area on the bank. Certain materials do not respond well to specific cleaning techniques and products, so testing a new product using only a tiny portion is best.

    The Boiling Water Method

    Boiling water on its own can indeed be a cure for burnt pots. If you’re looking to save an hour scrubbing a burned pot but to no avail, Try this technique.

    Rub the pot to eliminate any burned surface as possible. Fill the pot with water that is boiling. It is essential to have enough water to cover the burned area a bit more. Please bring it to a simmer and cook for approximately five minutes. After that, remove the water and scrub it with an abrasive sponge scrubber suitable for the pot. To get mild charcoal, boiling water can soften the areas and let you clean more effectively.

    Cleaning With Vinegar

    Vinegar is a great natural cleaner. I’ve spoken about it in the past over on Clean My Space. If you’ve not read one of these articles, I would suggest looking at seven creative ways to Clean with Vinegar.

    It is common to save the pan from scorching with water and vinegar alone! It’s pretty wild! First, you must get rid of as much burned food as possible and scrub thoroughly. Next, add equal amounts of water and vinegar into your container. It is essential to cover the burned area a bit more. Bring the wine and the water up to a simmer, and let it boil for 5 minutes. The vinegar’s acidity will help to remove the stubborn stains.

    After five minutes, allow to cool. It is possible to keep the solution of water and vinegar in the saucepan until it cools. Then, take the contents and scrub them thoroughly.

    Cleaning With Vinegar And Baking Soda

    Sometimes, just vinegar isn’t enough, and you must stick with natural cleaning products or even items you already have at the bottom of your cupboard. This is the reason baking soda is a good choice. Similar to vinegar, baking soda is a fantastic natural cleaner. I have a ton of information on cleaning using baking soda, such as cleaning with baking soda is Fantastic!

    Grab baking soda and vinegar if you require additional assistance cleaning up your burned pan. Also, get rid of all the burned food as you can beforehand. After that, fill the vessel with vinegar (not discolored) to ensure it covers the entire burnt area. Bring the mixture to a boil, lower the heat, and let it simmer for a few minutes.

    Take your pot off the heat. Once the vinegar has cooled and the vinegar is no longer hot, add three teaspoons of baking soda (or more if you have a larger pot). The baking soda reacts with the vinegar and starts fizzing up, so I suggest making this step by putting it in the basin. Once the bubbling has stopped, then pour the liquid out.

    Give the pot an extensive scrub. If you spot any troublesome areas, you can throw a small amount of baking soda and scrub it over the place.

    Dishwasher Tablets to the Rescue

    Dishwasher detergents and tablets are specially designed to reduce food. This is why they are effective in tackling pot burns. Don’t simply toss your pot into the dishwasher using tablets, and try this trick instead.

    Clean to get as much burned area as you can. After that, fill the container with enough water to cover all the burned areas. Add a tablet for the dishwasher or one tablespoon of dishwashing liquid. Bring the mixture to a simmer and let it simmer for ten minutes. Pour the water out and scrub it thoroughly if spots remain after the initial round; repeat until the area is clean.

    How To Clean A Burnt Pot

    Burning a pot by accident can be extremely difficult. There are a variety of options to keep your kitties safe. Always test an area before applying cleaning products to the whole object. This applies to any cleaning process you use with any material!

    If you know of a foolproof method of cleaning pots, please share via the comment section. What can you do to save your burned pots? Do you have an incident in the kitchen that could not be avoided?

  • Glass Cleaning: The Ultimate Guide

    Glass Cleaning: The Ultimate Guide

    Glass surfaces get dirty super quickly. In addition, I receive lots of inquiries about the best way to wash glass. Most often, I am windows, stove tops made of glass, or shower doors. I’ve written about a few aspects of these before, but I’m still asked about this topic frequently.

    In addition, I will discuss my homemade glass cleaner recipes with you! Welcoming to the fantastic realm of cleaning glass. It’s like entering Mr. Wonka’s chocolate factory, except it’s not candy but with more microfiber towels and spray bottles.

    Loading ad How To Clean A Glass Stove Top

    Cleaning your stove’s glass is essential to avoid scratching and chipping and keep it in “health” if you intend to. There isn’t much you need to clean your glass stove top efficiently. Just grab the non-scratch sponge, an empty cup of hot water, microfiber towels, baking soda, paper towels, and gloves made of rubber.

    It’s a good thing that Maker’s Clean has microfiber cloths made explicitly for glass cleaning: the Glass & Electronics Flat-Weave Microfiber Cloths. They’re specially made to polish and clean fragile surfaces such as television screens, stovetops made of glass, and many more. Many microfiber cloths are terry weaves and can scratch the surface of mirrors or glass. Therefore, I strongly recommend using a specialized microfiber cloth for cleaning glass.

    First, ensure that your stove is excellent. Then, sprinkle ample baking soda over the stove’s top. After that, soak your microfiber towels, ensuring they are damp but not drippy, and place them flatly on the stove’s top. It is best to use beautiful warm water. Be sure to protect your hands with dish gloves. The hot water can activate the baking soda, eliminating stains and grease. Allow this to sit for 15 minutes.

    After 15 minutes, you can remove the microfibers that are wet. One cloth cleans the stove’s top using the “S” pattern. After removing as much of the stove’s surface as possible using the microfiber cloth, switch to the sponge. Use only your sponge’s scrubby part, not the abrasive side, and then work to remove any stains left.

    If you encounter difficult stains that aren’t coming off, add some baking soda and moisture and allow it to rest for a few hours. Take an instrument made of plastic, such as a spatula, and scrape the blemish off. Please don’t use a metal tool for this because it may cause damage to the stove.

    When all grime and dirt are gone, take an utterly dry and clean microfiber cloth and polish the stove’s glass until it shines as new!

    How To Clean Glass Shower Doors

    Many people have asked me to clean shower doors made of glass! It’s a good thing for us who have these doors; it’s not a problem. Get some vinegar, and put it in the spray bottle. Also, you’ll need a squeegee, microfiber cloths, and an un-scratchable sponge.

    Vinegar is a great shower cleaner. And especially for glass shower doors, mixing it with water isn’t necessary. Sprinkle some vinegar over the shower doors. It is possible to do this generously. Allow this to rest for about 10 minutes to work on soap scum before opening the shower doors.

    After 10 minutes after ten minutes, grab your non-scratch broom and begin scrubbing. From top to bottom and from left to right, similar to the “S” pattern until the soap scum has gone. After that, you’ll have to wash using hot water. Removable shower heads are an excellent tool; however, if you don’t have one, you can use an empty container to fill the shores.

    Next, pretend trash and get that Squeegee! Make sure your doors are clean and squeaky clean to prevent streaks. Follow with a microfiber cloth to smooth. Sometimes it’s helpful to play “Workin’ at the Car Wash, Ya!” But I’m going to digress. If you want more information on maintaining your bathtubs and showers, read my post How To Clean A Bathtub and Shower Like a Professional!

    How To Clean Windows

    The most frequently asked glass cleaning question I receive is, “Hey Melissa, how should I clean my windows? !” There are numerous different parts and kinds that windows come in (think windowsills, second-story windows, and so on.) If you’re looking for the complete information, refer to my post, How to Clean Exterior and Interior Window. But for the fundamentals on how to clean windows, continue reading.

    All you require to wash windows is an aerosol spray bottle with water, vinegar, and microfiber cloth. Mix one cup of water with a cup of vinegar into the spray bottle and shake to mix. After that, I wipe the window down using the cleaning product. Utilizing my microfiber cloth, I use the “S” pattern until the window is spotless. Follow these steps to ensure your window is sparkling and streak-free in seconds.

    Glass Cleaning The Easy Way

    Glass surfaces can get dirty quickly. Scrummy fingerprints, dirty soap residues, and grease food stains are visible immediately on any glass surface. However, having easy DIY glasses cleaning recipes, glass cleaning tools, and glass cleaning methods in your pocket ensures that the glass surfaces of your home will appear at best in no time and with ease.

    What are the things you have to clean repeatedly? Have you tried these simple glass cleaning tips? Drop us a line to discuss your glass cleaning struggles and experience.

  • My Best Cleaning Hacks: 6 Cleaning Tips

    My Best Cleaning Hacks: 6 Cleaning Tips

    If I could have a dime for each time someone has said, “I meant to clean, but I just didn’t have time,” I’d be in a tropical paradise instead of creating this blog! I’m busy, you’re more active, and we’re all. Cleaning isn’t always easy, but it’s a part of our daily routine.

    This is the reason I write many blog posts on cleaning fast! This is why I’m always trying new cleaning techniques and tricks that will help you save time in keeping your home clean.

    Eliminate Stinky Trash Can Odors

    There is nothing worse than a smelly trash can. However, our trash containers hold rubbish (a blatant declaration of the year’s prize), and I’ll start to smell. Even our indoor trash bins, particularly in the kitchen, could be quite smelly! Cleansing your garbage container is an effective way to eliminate odors, but we ca unable to wash our trash bins each week! What can we do to reduce smells and not spend all the time cleaning?

    Newspaper! You may be thinking that. It’s fair. The newspaper crumpled on the bottom of your trash bin helps to absorb the odors and odors that emanate from your trash bin. When you empty your trash, make sure to throw out the newspaper in with it too. Refresh the newspaper before you put it in a new bag. This will help keep your trash from smelling and having to clean up your garbage too often.

    DIY Armpit Stain Remover (Laundry Hack)

    Have you ever pulled your clean laundry from the washer only to discover that your light-colored shirts are stained with yellow spots under your armpits? I’m sure I’ve. What is your first reaction when you notice this? The older Melissa would indeed have put them back in the laundry. It’s the equivalent of two laundry loads and double the work! And, of course, it’s a massive waste of water.

    Instead of re-doing your laundry, beat the yellow stain with my armpit stain remover recipe. For this, mix baking soda with water to form an emulsion. There are no right proportions here. You’re trying to achieve a pudding-like consistency. Examine your clothing for stains before adding them to the laundry. Apply the paste to your clothes and let it rest for at least a night. Put your clothes in the washing machine the next day, and they’ll be stain-free! If you still see stain streaks after this recipe, replace the water with hydrogen peroxide to make a fantastic homemade stain remover and lightener.

    Banish Wrinkled Clothes (No Iron Needed)

    Do you remember when your parents removed the iron for nearly every shirt? Yes, I do. But do I want to be a solitary person who irons my family’s clothing? No! Instead of letting our clothes wrinkle during the washing machine, let’s get rid of wrinkles and the reason and reduce the need to iron.

    Once your washing machine ceases to spin, then grab your laundry. But not until you’ve washed this entire episode! Letting clothes sit wet in the washer is a sure method of creating wrinkles. Thus, placing items straight into drying or hanging them up immediately after the machine has done will help avoid wrinkles. Give each item an excellent snap before putting it in the dryer or the rack for laundry. The image will shake it out of shape after all other clothes are stacked on top in a mass in the washer.

    Smelly Sponges Refreshed

    Have you ever taken an odor from the kitchen sponge and realized it has a distinct smell? It’s because sponges are created to soak up all the food waste, grease, and other things that accumulate on our kitchen counters and dishes. Whatever way you rinse a sponge, it cannot thoroughly wash out the pores within it.

    At least, that was the case before Scotch-Brite’s Scrub Dots Sponges. These sponges have scrub dots which means they are washable! This means that you can keep them longer without the risk of contaminating your dishes and the stench of a sponge.

    Scotch-Brite Scrub Dots are not scratchy, heavy-duty sponges, or even dishes wands! If you want more information on time-saving, money-saving, high-quality dishwashing products, read 12 essential products to Optimise Your Dishwashing Routine.

    Dusting Hacks for Eco-Friendly Cleaning

    In the context of laundry, do you make use of dry sheets? If you’re wondering what dryer sheets have to be related to dusting, you can check out the fascinating world of a professional’s brain! It is possible to give dryer sheets a second chance before throwing them into the garbage (reduce reuse! ).

    Take a dryer sheet from the recycle bin and clean your baseboards! Dryer sheets that are used don’t have the coating it does before washing; however, that’s an excellent option for cleaning your baseboards. Even after washing, your dryer sheets will carry an electrical charge and draw dust. Clean your baseboards using your dryer after you’ve finished your laundry.

    If you don’t have dryer sheets but want to go green, make sure you dust using Microfiber cloths. In this way, you’ll be able to recycle your cleaning tools and not end up in the garbage. In any case, your baseboards are sure to look fantastic!

    Quick and Easy Pet Hair Removal

    If you have a pet or cat, you are probably aware of the nightmare of pet hair. It’s everywhere. Pet hair can escape even the regular vacuum. What can dog owners try to do?

    My preferred quick and easy way to get rid of pet hair is a Squeegee. Please use a squeegee, then spread it to sweep any area with hair. This is especially effective on upholstery and carpets. I suggest using short strokes; you’ll have to go through the site a few times. Once you’re done, you’ll be stunned by the amount of hair hidden on your couch.

    Cleaning Tips for A Cleaner Home Faster

    That’s all for this article on cleaning hacks! A few small tricks in our minds can assist us to keep our homes clean and tidy in just a little time. Although you cannot keep a clean house, keeping track of the minor aspects will keep things clean during the week and simplify the process of tidying your entire home.

    If you’re looking for more cleaning tips, read How Clean is Your Home: Five Clean Tips. And if you have any information we didn’t cover, submit your suggestions in the comments below.

  • How To Get Salt Stains Out Of Shoes: Winter Cleaning Hacks

    How To Get Salt Stains Out Of Shoes: Winter Cleaning Hacks

    It’s a pity… the weather is cold outside! I don’t know where you are; however, here in Canada, we’re out. We’ve got snow on the ground, we’ve had ice, and now we’ve got plenty of salt! Salt stains can be a significant trouble. They end up on the bottoms of our long coats, the tires of our cars, and, of course, our shoes!

    If you’re feeling the winter blues, don’t worry. After learning how salt melts ice and the best way to wash with vinegar and vinegar, your winter blues will vanish. Then you’ll be left with the cleaning blues instead.

    However, salt stains are a surefire way to make me feel guilty. I’m sure they’ll make you feel down as well. Let’s tackle this winter-related cleaning problem by using my cleaning tips for removing salt stains from your shoes, tips to remove salt stains from Uggs, and a DIY salt stain removal!

    It’s funny; How to Get Salt Stain Off Your Boots was my first YouTube video! Go check it out if you need a laugh or poor lighting! Whatever you do, try not to throw away an excellent pair of boots due to salt-stained stains. Instead, use these tips to come to your rescue so that your shoes can endure the winter for another year.

    Why Does Salt Melt Ice

    Salt can cause problems for the butt regarding our shoes and other things, but it could also protect the risk of breaking your butts by falling and sliding on the ice. Why do we need salt to melt the ice?

    Salt on its own won’t melt the ice. It’s water and salt that melts ice and stops it from freezing. When salt and water mix in a way, it lowers the freezing temperature that the water has. This is the reason it’s more efficient to remove salt before freezing. Because if rain or snow falls on the salt, the temperature decreases, and the salt can prevent freezing and forming. Pretty neat, huh?

    If you’re wondering what is happening, then this is to ensure that you can make the best choice regarding salting your sidewalk and driveway! Understanding how salt works will assist you in selecting the most suitable salt for your needs or choosing the most appropriate alternative.

    All road salts are not made equal. Road salt is quite damaging to the natural environment. Imagine that people used to sprinkle salt on their adversaries’ soil!

    There are eco-friendly alternatives available that are more sustainable for the earth, better for wildlife in your area, and safer for your footwear. It’s impossible to guarantee that eco-friendly alternatives won’t cause stains on your shoes, and their non-toxic ingredients are less abrasive and will be easier to clean up in the event of colors.

    DIY Salt Stain Remover: Cleaning With Vinegar

    I’ve spoken often about cleaning with vinegar. If you’re unfamiliar with Clean My Space, I strongly suggest looking at 7 Creative Ways to Clean Your Space Using Vinegar. And salt stain remover is a great option to use vinegar!

    To remove salt stains, you only need vinegar, a teaspoon, and a Microfiber fabric. That’s it! If you’re thinking, this isn’t a recipe, Melissa, it is! It’s a lot simpler than a recipe with only one ingredient.

    How To Get Salt Stains Out Of Shoes

    The process of removing salt stains from shoes is simple. In the beginning, employing a microfiber towel to brush or rub as much dirt and salt off the boot as much as possible. Then, grab another microfiber cloth and dampen it with about one tablespoon of vinegar. Keep in mind that you can make more additions if necessary.

    Clean the areas that have been stained by salt in your shoes. If you have a lot of salt-stained staining that hasn’t been removed immediately, you may require a bit of elbow grease. A clean toothbrush could help in this case. Before you ask, vinegar will not harm your shoes.

    It’s all you must do to clean the ugly salt stains off the winter booties. I promised you it would be simple!

    How To Get Salt Stains Out of Uggs

    Many people ask me how to get salt stains out of their shoes. However, many of those inquiries focus on Uggs specifically. Many of us own an excellent pair of Uggs that we love to be warm in winter. However, Uggs are susceptible to salt-based stains! But I’ve got an effective cleaning method for Ugg wearers.

    Cleaning Uggs is almost identical to washing other types of shoes. However, Uggs are made from sheepskin, so they’re more sensitive than other footwear.

    Start cleaning the inside of your Uggs with a brush with a suede-based brush that was designed to brush shoes. Ensure you are brushing in a single direction (top to bottom). This will help remove the grime and dirt.

    Then, soak the area that is stained. Do not soak the entire boot; just wet the area you want to treat. There are two alternatives. You can apply a suede stain remover and follow the steps. Also, you can make use of a 1:1 cleaning solution with water. Use a gentle microfiber cloth.

    Winter Cleaning Hacks

    Being aware of salt stains is the most effective method of preventing them from becoming. If you allow a shoe to remain in the shoe for a long time, it will become more challenging to wash. Removing salt stains as soon as they occur can prevent them from forming, making them harder to clean.

    Winter brings all sorts of cleaning issues. However, at Clean My Space, we strive to tackle these issues one post at a time. Read the article How to get rid of Winter Boot Messes and How to Wash a Coat In Winter Coat to find the best winter cleaning tips.

  • How to Clean An Electric Kettle and Stovetop Kettle

    How to Clean An Electric Kettle and Stovetop Kettle

    Most adults cannot live without tea and coffee without these two drinks. I’m not sure about you. In my home, there’s tea for me, coffee, and tea for Chad early in the morning, and nobody does anything. This week I published a piece about cleaning a Keurig coffee Maker. If you’re a Keurig woman or man, take the time to go through the article.

    For all you kettle users, this morning, I will show you how to clean your electric kettle stovetop and remove the scale from a kettle. Additionally, I’ll let you inside a professional cleaning trick if you want to know how to get fingerprints off stainless steel kettles.

    There’s no need to clean your kettle often, but if you see limescale buildup in your kitchen, it’s a sign that it’s time to wash. The limescale buildup appears chalky white. It’s not harmful, but it’s certainly not tasty. It also doesn’t look very appealing in your neat, tidy kitchen. Therefore, make your morning coffee ritual (or decaffeinated tea routine, No exclusions here!) as comfortable as possible before you begin your day.

    How To Clean An Electric Kettle and Stovetop Kettle

    The first step in cleaning your electric kettle is to disconnect it! Don’t begin cleaning your kettle once it’s connected. This does not apply to kettles on stovetops; however, regardless of the kind of kettle you own, ensure that it’s cool before beginning cleaning.

    When your kettle is cooled, fill it with hot water with a teaspoon of dish soap. The kettles made of stainless steel and copper are scratchable, so use a microfiber fabric and a scratch-resistant sponge to clean and dry. Make sure you have a non-scratch-sized sponge, and clean your kettle using hot soap and water. Afterward, you can use the sponge to wash away the soap solution, ensuring your kettle won’t feel stuck to your hands. Don’t immerse an electric kettle in water.

    To get rid of any stubborn spots like limescale or watermarks, You’ll need to create the cleaning solution using equal parts of white vinegar, water and. The answer will be soft enough to be used with your electric kettle; however, read the manufacturer’s instructions. If you’re unsure, test one small area on the bottom of the kettle before moving on. It may take a little longer, but it will help you avoid damaging the kettle.

    Mix baking soda with white vinegar to create an emulsion if your kitchen appliance is made of enamel or steel. There’s no exact recipe for this, but you’re just looking for the consistency of a paste.

    Use your vinegar solution or apply it to those difficult spots on the exterior of your pot. Clean it up like your life is on it! At the very least, scrub as if your morning coffee depends on it.

    If you’d like an extra glimmer,, fill the spray bottle halfway with water and he other half with vinegar. Next, grab an unclean microfiber cloth and give it a spray. Then, buff your kettle using your moist microfiber cloth, and voila.

    How To Get Fingerprints Off Stainless Steel and Other Materials

    I’m going to share with you the secret of professional cleaning. Have you observed that it leaves permanent fingerprints regardless of how often you wash your kettle? I have a secret cleaning technique for you. It does not involve cutting people in half.

    If you want to remove the stains from your pot, use baby oil. Apply a small amount of baby oil onto a clean, damp cloth. Smooth the surface of your kettle using this. Follow this up with a clean towel to ensure that your kettle does not appear slippery or oily.

    This method works on the majority of kettles that have fingerprints. However, ensure you follow instructions from the manufacturer and make an initial test patch before going out.

    How To Descale A Kettle (Electric or Stove Top)

    So, we’ve covered only the exterior of your pot. What about the inside? I can feel the gasps of shock from my computer while I compose. “Melissa, It’s in my kitchen! It’s spotless!” Well, that’s the wrong place to be.

    As limescale and water can accumulate outside the kettle, they could (and will) get in the interior. This means you must clean your kettle, i.e., remove the limescale from your kettle every couple of months. I love doing this after an entire deep cleaning in my kitchen.

    The kettle should be filled with a 1:1 mix of vinegar and water. Please bring it to a simmer, switch off the heat, and let your kettle cool for at least 20 minutes. Then, remove the solution and wash it. If you’re worried about the vinegar smell, make sure that you fill the kettle with water and bring it back to a boil. Then discard. This will get rid of any lingering vinegar.

    Vinegar is the key ingredient to keep your kettle spotless; however, it’s also an excellent cleaning tool in many other places. For more information on cleaning with vinegar, check out five intelligent Vinegar Hacks.

    Clean Your Electric Kettle and Stove Top Kettle

    Whether you have a fancy electric kettle or a traditional kitchen stove, you must cleanse your kettle now and then. When I wash my oven, I usually clean my kettle that self-cleans so I don’t overlook it.

    If you have a well-maintained kettle, you’ll be able to enjoy your morning coffee just a bit more. Also, that sneaky afternoon cup also. While you wait for the water to come to a boil in the kettle that you have cleaned, please go through our article Five Minute Cleaning Jobs Cleaning Hacks to Clean Quickly to master several small cleaning tasks you can accomplish during the period it takes for your water to come to a boil.

  • How to Clean Crocs: Shoe Cleaning Tips

    How to Clean Crocs: Shoe Cleaning Tips

    Are Crocs trendy? It’s a question that has been asked for years. Personally, when you’re in love with these shoes, you’ll rock the pair! I have OG Crocs sitting on an office shelf (true story, check the photos below). Yes, I’m that type of person. Ultimately, whether the question is to Croc or not, Croc is the question. What’s not a question now is how to get rid of Crocs since I will address that question this morning.

    Fortunately, cleaning Crocs is pretty simple. The method you use to clean your Crocs will depend on the type of Crocs you have.

    So, no matter what kind of Crocs you wear, showing off the streets in a tidy pair is possible.

    How to Clean Crocs

    Classic Crocs, also called Classic Clogs, are made out of Croslite, the signature material that the firm trademarks. Croslite is a foam, which makes it water-proof and easy to clean. You only need moderate dish soap, a Microfiber towel, a cleaning toothbrush, and hot water to clean your classic Crocs.

    Begin by washing the Crocs in warm water. This will help remove any accumulated dirt and help you get your work done. Fill your tub or sink with warm water. Add one teaspoon of dish soap that is mild. Then, soak your Crocs for a minimum of ten minutes. The dish soap can help remove grime and dirt quickly.

    Rinse your Crocs with water and apply the cleaning brush to scrub. The toothbrush can be helpful to get vent holes in the interior and other places that are difficult to reach. After you’re done, clean to dry and polish your Crocs with a microfiber cloth.

    Alternatively, you can put Crocs into the washing machine in a gentle cycle. I would not do this unless they require a thorough cleaning, as it can cause them to wear out faster than hand washing.

    How to Clean White Crocs

    I receive a lot of inquiries, specifically on cleaning white shoes. So, before it’s too late, let me show you the best way to clean your white Crocs.

    If your white Crocs were initially Crocs, clean them like traditional Crocs. If they are slightly dirty Crocs, it could be sufficient. However, classic white Crocs tend to be soiled by dirt and grass staining over colored Crocs, and maybe you are just a fan of super white Crocs. Don’t worry; I’ve got a clean technique for you.

    Clean your classic white Crocs following the directions in the earlier section. Next, take out the baking soda. Use a clean, moist microfiber cloth, and smooth your white Crocs using baking soda until they’re sparkling.

    It’s possible to do this with lined white Crocs also. However, be sure to use baking soda only for the Croslite material and not the lining or any other material that’s not Croslite.

    How to Clean Fuzzy Crocs or Lined Crocs

    Okay, you’ve found those incredibly cozy-looking lined Crocs. In the first place, I’m super jealous! But that’s not the reason why you’re here. Cleaning your lined fuzzy Crocs will require more elbow grease. The lining on Crocs doesn’t get rid of, and you aren’t able to soak them in water or toss them in the washer.

    Instead, take a microfiber cloth,, an unclean toothbrush, an ice-cold bowl, and a couple of drops of gentle dishwashing soap. You will dampen your microfiber with warm water and dish soap and gently scrub the exterior inside of the Crocs (and do not scream at me with the phrase”moist”!). Ensure not to splash this solution onto the lining, only on the Croslite outside. Use your cleaning brush to wash the soles and air vents well.

    If the lining of your Crocs may be smelling unappetizing, Baking soda can help again. Sprinkle a small amount of baking soda on the lining, and let the lining sit overnight. Scrub off the excess the next day, and you’ll have fresh-smelling Crocs.

    If you’re thinking, Melissa, a bit of baking powder won’t be enough to solve the foot odor. I know what you’re thinking! Please go through my DIY shoe Powder to find a potent solution for stinky shoes.

    Clean Your Crocs

    Anyone with Crocs should be thankful for the blessing: Crocs are probably the most accessible shoes to wash. Their water-resistant Croslite material creates classic Crocs that are effortless to clean. The fuzzy-lined and furry Crocs are a breeze to clean up in a very short time.

    If you’re searching for more shoe-cleaning tips, check out the article How To Clean Your Running Shoes and Clean Your Canvas Shoes (Toms and Keds). And if you notice that your shoes are beginning to smell weird, read How to Deal with Smelly Shoes.